My Hmong Coraline Doll
the friendly poj ntxoog
Julia Xiong October 1, 2020

Her name is Gao Shoua and she is my squishy.
My Frankensteina.
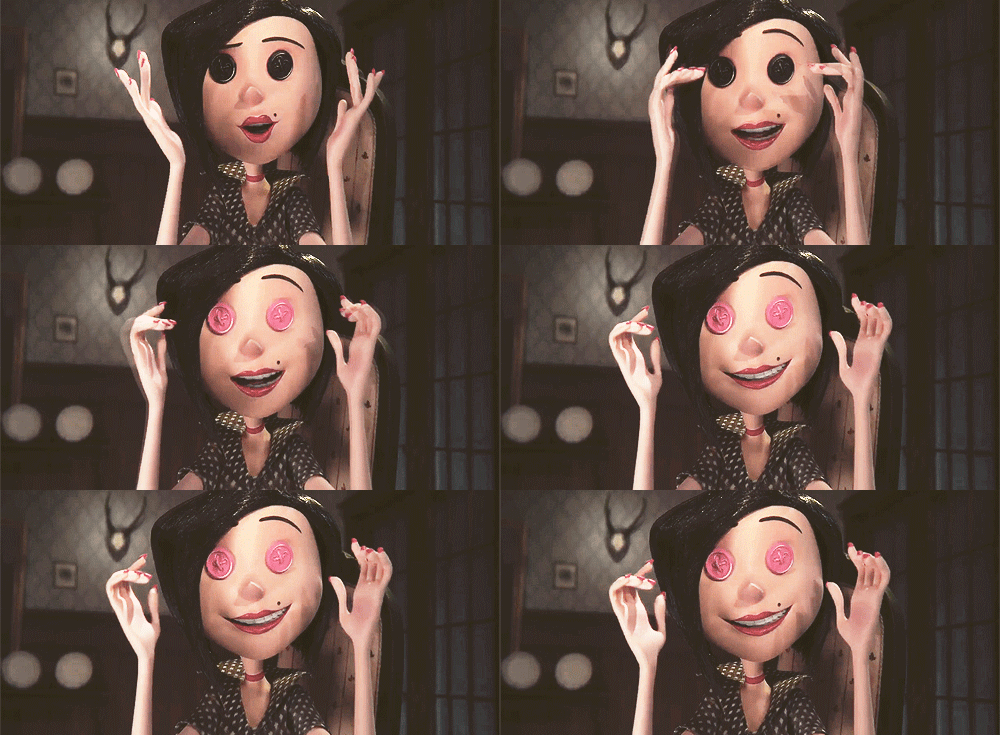
Gao Shoua was of course inspired from Laika's production of Coraline. I have always been a fan of the spooky-whimsical aesthetic that closely ties with autumn and Halloween.
I happened upon Rachel Maksy's video tutorial of how she made her own Coraline doll. The best thing I learned from her video is that these dolls aren't perfect and therefore you can be more accommodating with the materials you decide to use. Here are the items that I used for my Hmong Coraline Doll:


TOOLS USED:
-
Wire Cutters
-
Masking Tape
-
Hot Glue Gun
-
Fabric Scissors
-
Needle/Thread
-
Pencil/Paper
-
Paint/Paintbrush/Water cup
-
Sharp edge tool/Round edge tool
-
Spackle/Sand Paper/Damp Cloth (optional)
MATERIALS:
-
Thick Wire
-
Aluminum Foil
-
Canvas or Thick Fabric
-
Clay (recommend Polymer)
-
Black Yarn
-
Fabric of Choice: black linen, maroon polyster, white cotton
-
Foam (upholstery cushion) or Cardboard

Step 1: Design
time varies
pencil
paper


Draw a design of your choice.
I wanted my doll to have a bigger head with a smaller/thinner body. I found it more helpful to draw the body first and then it's head.
Clothing-wise, there is a plethora of ideas. Instead of having her dressed exactly like me, I decided to have her wear Hmong clothes.
Almost every 90s Hmong American family had one of those plastic dolls that wear Hmong clothes. I always thought they were really creepy as a kid and so I wanted my own version as an adult.
(This one below haunts my hometown.)


Step 2: Making the Skeleton
30 mins
thick wire
masking tape
aluminum foil
I had this leftover wire from a previous project. I recommend using a wire that has more structure (like floral wire, but thicker). This wire is much too flimsy, but it was what I had on hand.

Form the legs
I started with the legs first. Creating 2 long loops using the thick wire with the help of masking tape. I made sure to leave enough slack for the 'waist'.
Form the arms
Using the same method, I wrapped 2 shorter loops on the sides for the arms.
I left out the 'neck', because I didn't think I needed one. This is up to you.
Form the base of the head
I created a little loop for the base of the 'head'. This is so the aluminum foil will have something to hold onto. Using aluminum foil, I wrapped a ball around the base. This will just add volume for the clay head to lay over.
(Yes, I forgot to take a photo here, so I had to terribly edit this photo)


Step 3: Making the Head
1-4 days
clay
dowel/roller
nail filer or sharp edge tool
wall spackle (optional)
sandpaper (optional)
DISCLAIMER: For the clay, I used Model Magic from Target. I already had this in my supplies, but I don't recommend this product. It is difficult to mold, doesn't hold shape, takes forever to dry and leaves cracks. I left it to air dry for about 3 days and even then it still wasn't fully dried. Rachel Maksy used Polymer Clay (a baking clay), which I highly recommend.
Cover the Aluminum Foil
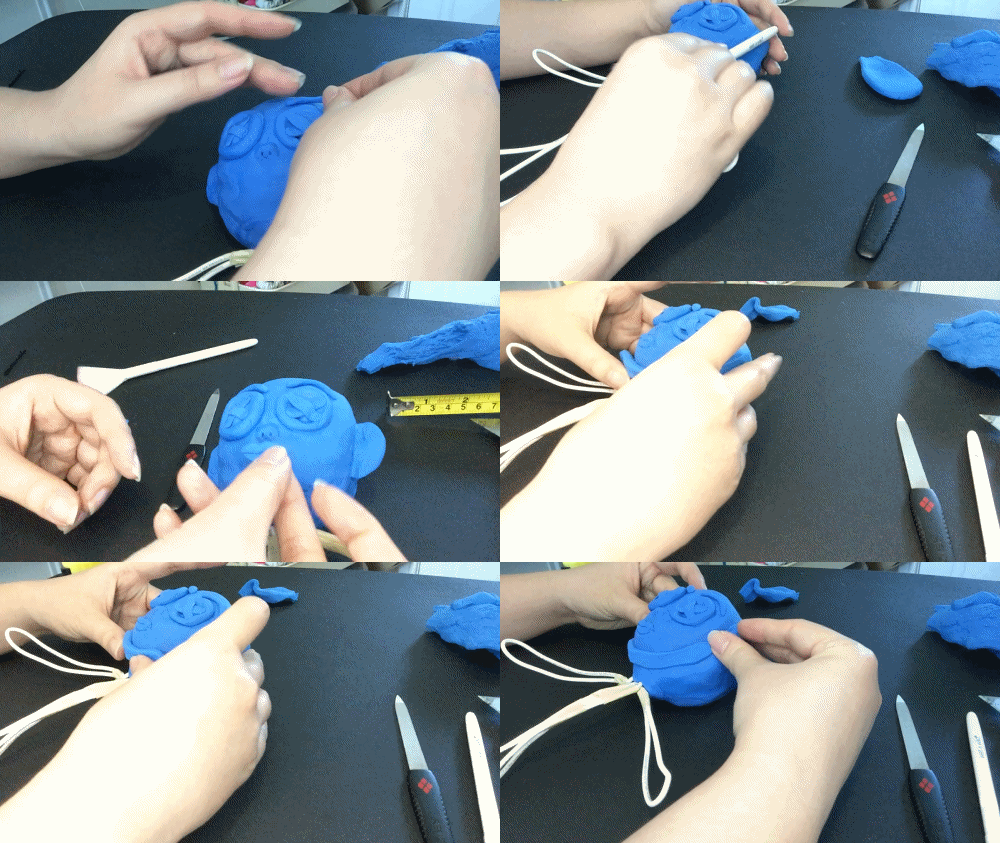
Like making a pie crust; section off some clay, roll into a ball and flatten out with a round tool. Fully cover the aluminum foil with these 'pie crusts'.
Shape the Head
Once all the aluminum foil is covered, I added more clay to create the shape I wanted. I focused more on the face, like shaping in sunken cheeks and a nose.
Add the eyes, lips and eyebrows
I created the button eyes, lips and eyebrows separately to be added on. I was able to shape some pieces using a sharp edge tool, I used the end of my nail filer. The clay wouldn't keep the shape of the ears, so I ended up scrapping them. I accidentally made one brow much more arched. So my doll is permanently judgmental. In hindsight, I should've just painted in the eyebrows instead of shaping them out of clay as well.
Let air-dry
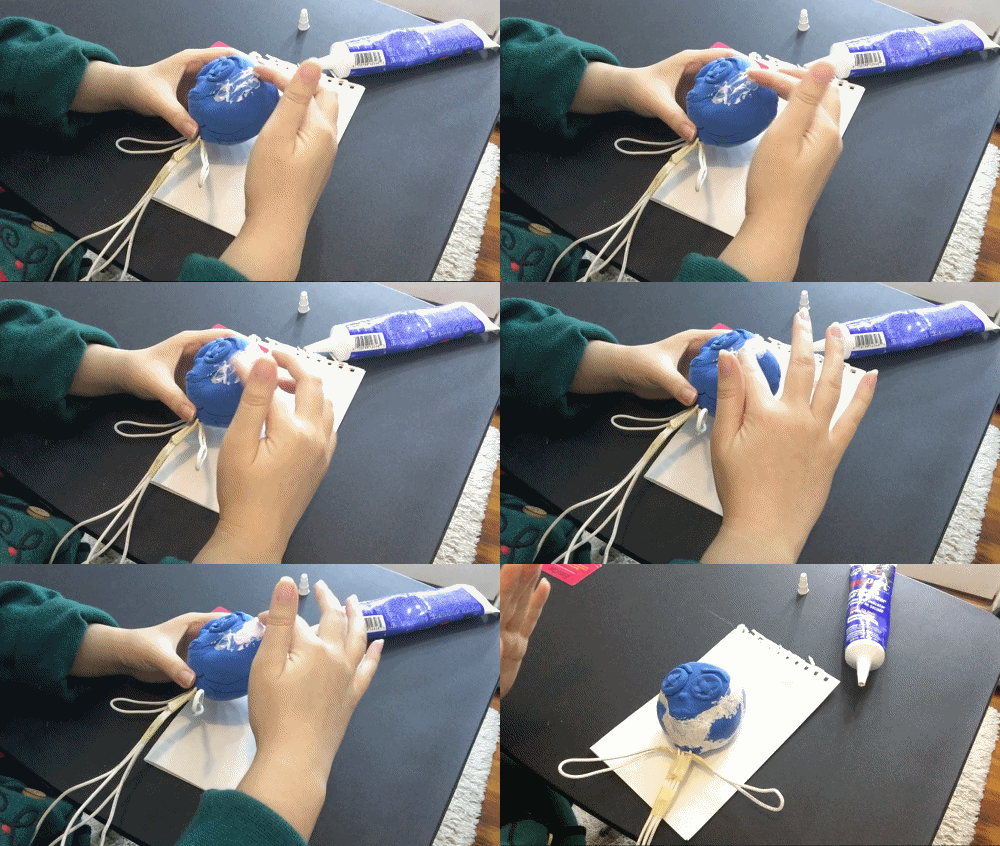
This took about 3 days. I had her resting upside (like a headstand). There were cracks everywhere. If you use Polymer clay, it bakes in a few mins (typically with no cracks).
Fill the cracks
After 3 days, I used some wall spackle I had on hand to fill the cracks. I focused on her face since the back of her head will be covered with hair. Let air-dry again. This took about 15 mins.
Sand the spackle
Using sand paper (I had 80 grit on hand), I smoothed out the spackle on her face. Be gentle as this can take off the clay as well.


Step 4: Painting the Head
1-2 hrs
paint brushes: flat wide & tiny detail
acrylic paints: white, brown, black, red
damp cloth
cup of water
paint tray
clear nail polish
To me, this was the most fun part.
Clean the face
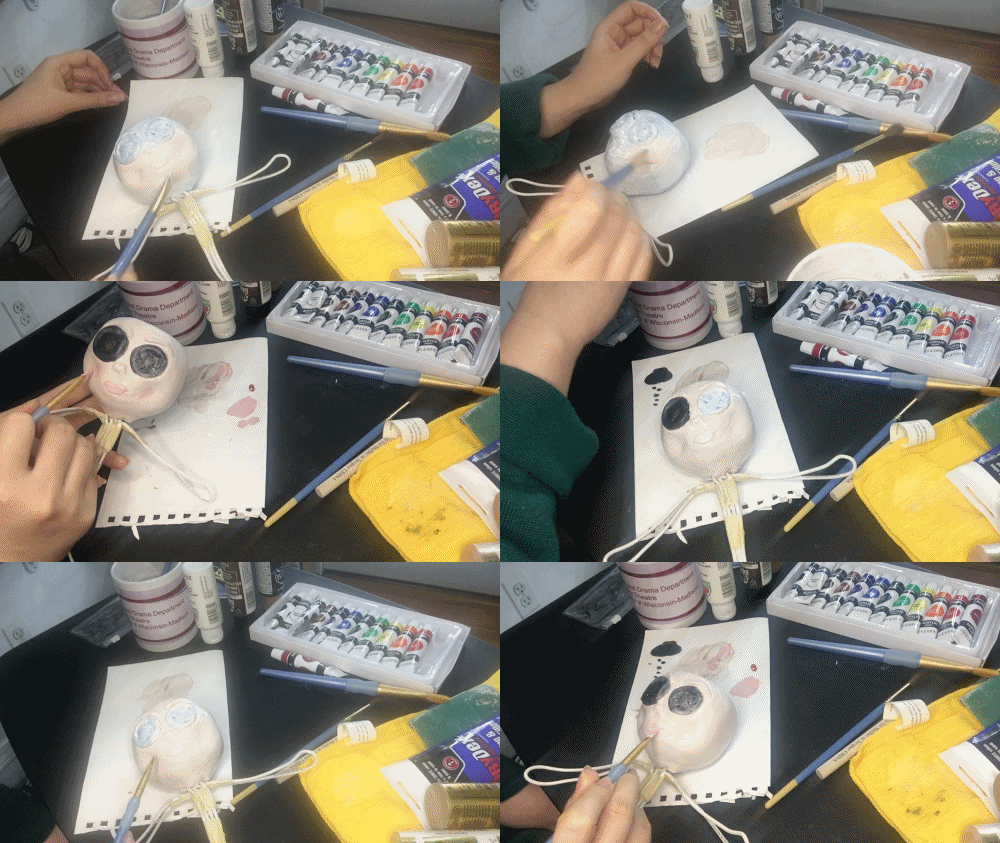
Using a damp cloth, I wiped away any dust from sanding away the spackle. Let dry. Takes about 5 mins.
Paint the base
I mixed white and brown paint to create my desired skin color. Using a flat wide brush, I painted 2 layers onto the face. Make sure to let air dry between layers. Takes about 10-15 mins.
Paint the lips and cheeks
I mixed a bit of red to the 'skin color' paint to create a light blush pink. When the areas are fully dried, I brushed this color over the cheeks and lips. I used a tiny detailed brush for this part.
Paint the eyes and hairline
Using a tiny detailed brush, I brushed black paint over the button eyes. This needed 2 layers, air dry in between layers. Using a flat wide brush, I also painted the hairline.
I also painted on my signature moles with the black paint.
Paint the eyebrows
I mixed some brown to the black paint, because I wanted a slightly different color from the button eyes.
Paint the hair
I painted the back of the head black to help cover any spots later on when applying the hair.
Add gloss to the button eyes
I used a clear nail polish to brush over the button eyes.


Step 5: Making the Skin
30 mins
canvas bag or thick fabric
sewing machines (optional)
pen
needle/thread
fabric scissors
I did this step while the face paints were drying in between layers.
For the skin, I used an old canvas bag. Mine had decorations on the outside so I was limited to using only one side of the fabric.
-
Trace your doll's body onto the decorated side of the canvas bag. Leave seam allowance.
-
Cut this shape out.
-
Sew the outside lines, making sure to leave a gap around the neck and shoulder area. I used a sewing machine, but this can be done using hand needle/thread.
-
Flip the skin inside out so that the decorative side is now on the inside. I used the end of a paintbrush to help with the narrow channels.
-
To make sure the skin suit fits, carefully fit this onto the doll.


Step 6: Stuffing the body
30 mins
cotton fill or scrap fabric
needle/thread
fabric scissors
paintbrush or long tool
Once the head is fully dried, I was able to stuff the body. I used leftover scrap fabric. This meant I had to cut up small pieces so that it'll fit inside the 'skin'.
Start at the feet
I found it easier to stuff the feet without the doll. Once the feet were slightly stuffed, I fit the skin suit over the doll (just up to the waist). I continued to stuff up the legs. I used the end of a paintbrush to help reach the tight areas.
Stuff the waist and arms
Use the same technique in the waist and arm areas.
Sew her up
When doll has reached desired stuffing, sew up the shoulder areas to close off the opening.


Step 7: Glueing the Hair
45 mins
black yarn
fabric scissors
hot glue gun
I used the yarn color that matched my hair color.
I used one strand of yarn to act as 2 strands of hair, draping it from the left to the right side of my doll's face. Choose your hair length.
I started with front, framing the yarn on my painted hair line. Once I got that, I found it easier to start gluing in sections versus in strands.


Step 8: Making the clothes
Depends: 1 day (for me)
fabric of choice
needle/thread
fabric scissors
hot glue gun
foam or thick interface
This step will vary. Here's what I did:
Top: Black Linen wrap top with cuffed sleeves
I did have to draft a pattern for this. I did a back, 2 front pieces and sleeves. Since my doll is tiny, I simply traced around her body to create these patterns.
Skirt: White Cotton pleated skirt
Cut out a long rectangle. Do an accordion fold on the short side of the fabric and iron this down. I then did a gathering stitch on the long side of the fabric and fitted this to my doll's waist. Sew the skirt to the doll's waist. Sew up the ends to create a seamless skirt.
Apron: Black Linen
Cut out a small rectangle. Sew this onto the waist/skirt.
Belt: Maroon Polyester, double belt
Cut out 2 long rectangles. One will be a thicker belt and the other is a thinner belt. Sew these on to the doll's waist as well.
Leg Wrapping: Black Linen
Cut out 2 long and rectangles to wrap around the doll's legs. Sew in place.
Hat: Foam and Black Linen
Cut out a piece of foam that fits around your doll's head. I stitched the foam together to create a pointed front. Using black linen and hot glue, I covered the hat.


AND VOILA...


For my first time crafting with clay (and a very bad clay) I'm happy with my results. I genuinely love my Hmong Coraline doll. She definitely isn't perfect, but none of us are.
If I have to change anything, it would have been the clay I used. I would change the shape of the button eyes and her eyebrows.
And for the folks worried that this doll is going to be 'watching' me... I made her so that actually makes me...

